Showing posts with label s1000r. Show all posts

Monday, 11 July 2022

BMW S1000R Lakes rideout Shap and Hartside pass 252 miles 7hrs riding / 9.5 hrs elapsed


pictures in reverse order from last to first 

The route (my phone updated and had signal issues so not as detailed as it should be but the stop offs are accurate)


working that dual compound rear tyre


Fuel stop 


Top of hartside pass 


bottom about to head up the pass!


Devils Bridge


Group starting fuel station in Preston


Monday, 16 May 2022

326 miles in a day around Wales on the S1000r gen2

The biggest single day trip Ive personally ever done on a motorbike ever.
A superb rideout with 
Rubber Side Down facebook group (which I only joined 12hrs earlier).

326 miles in total

started 730 am arrived home 12 hrs later!
at least 8.5 hrs in the seat

Had so much fun and riding I failed to take many pictures.
Bike was faultless.
scrubbed the rear tyre in nicely and finally noticed its a dual compound design
These bar risers (came on the bike) , are simply superb and I had no neck pain
( https://www.sportouring.co.uk/shop/mvmotorrad/mvbarrisers/mv-handlebar-adapter-bmw-s1000r-901443/ 
)


up to 10414 miles now (bike came with 9253) , 
so 1161 miles so far into ownership since 01/11/2021
a quarter of that mileage just on this day trip!
(tyres new at that stage too)


tyre now showing the obvious dual compound line
Pirelli Diablo IV


Saturday, 15 January 2022

2017 Gen2 BMW S1000R evotech tail tidy fitting install / UK number plate options (standard legal, 8x6, 7x5)

 why ?

+ : creates cleaner lines for the bike

- : provides less weather protection, you will get a wet/dirty back! rooster tails


you can also go for integrated tail lights (which removes the indicator stalks as well) but i find these harder to see and in my opinion not a great idea on a motorcycle (but do give an awesome clean rear end!)

options

many inc R&G , evotech, ebay copies etc

check out the https://www.s1000r.co.uk/index.php forum and do some searching lots of options,pictures and comment to help you decide

of note i didnt like the R&G as it spaces the indicators wider than the OE positions

evotech get good reviews , appears well made. full kit, includes a replacement LED rear number plate lamp


https://evotech-performance.com/collections/bmw-s-1000-r-2017-2020/products/bmw-s-1000-naked-2013-onwards-tail-tidy-2017-onwards

£82

(i got mine from https://chainspeed.co.uk/ , but they dont seem to sell them anymore! )


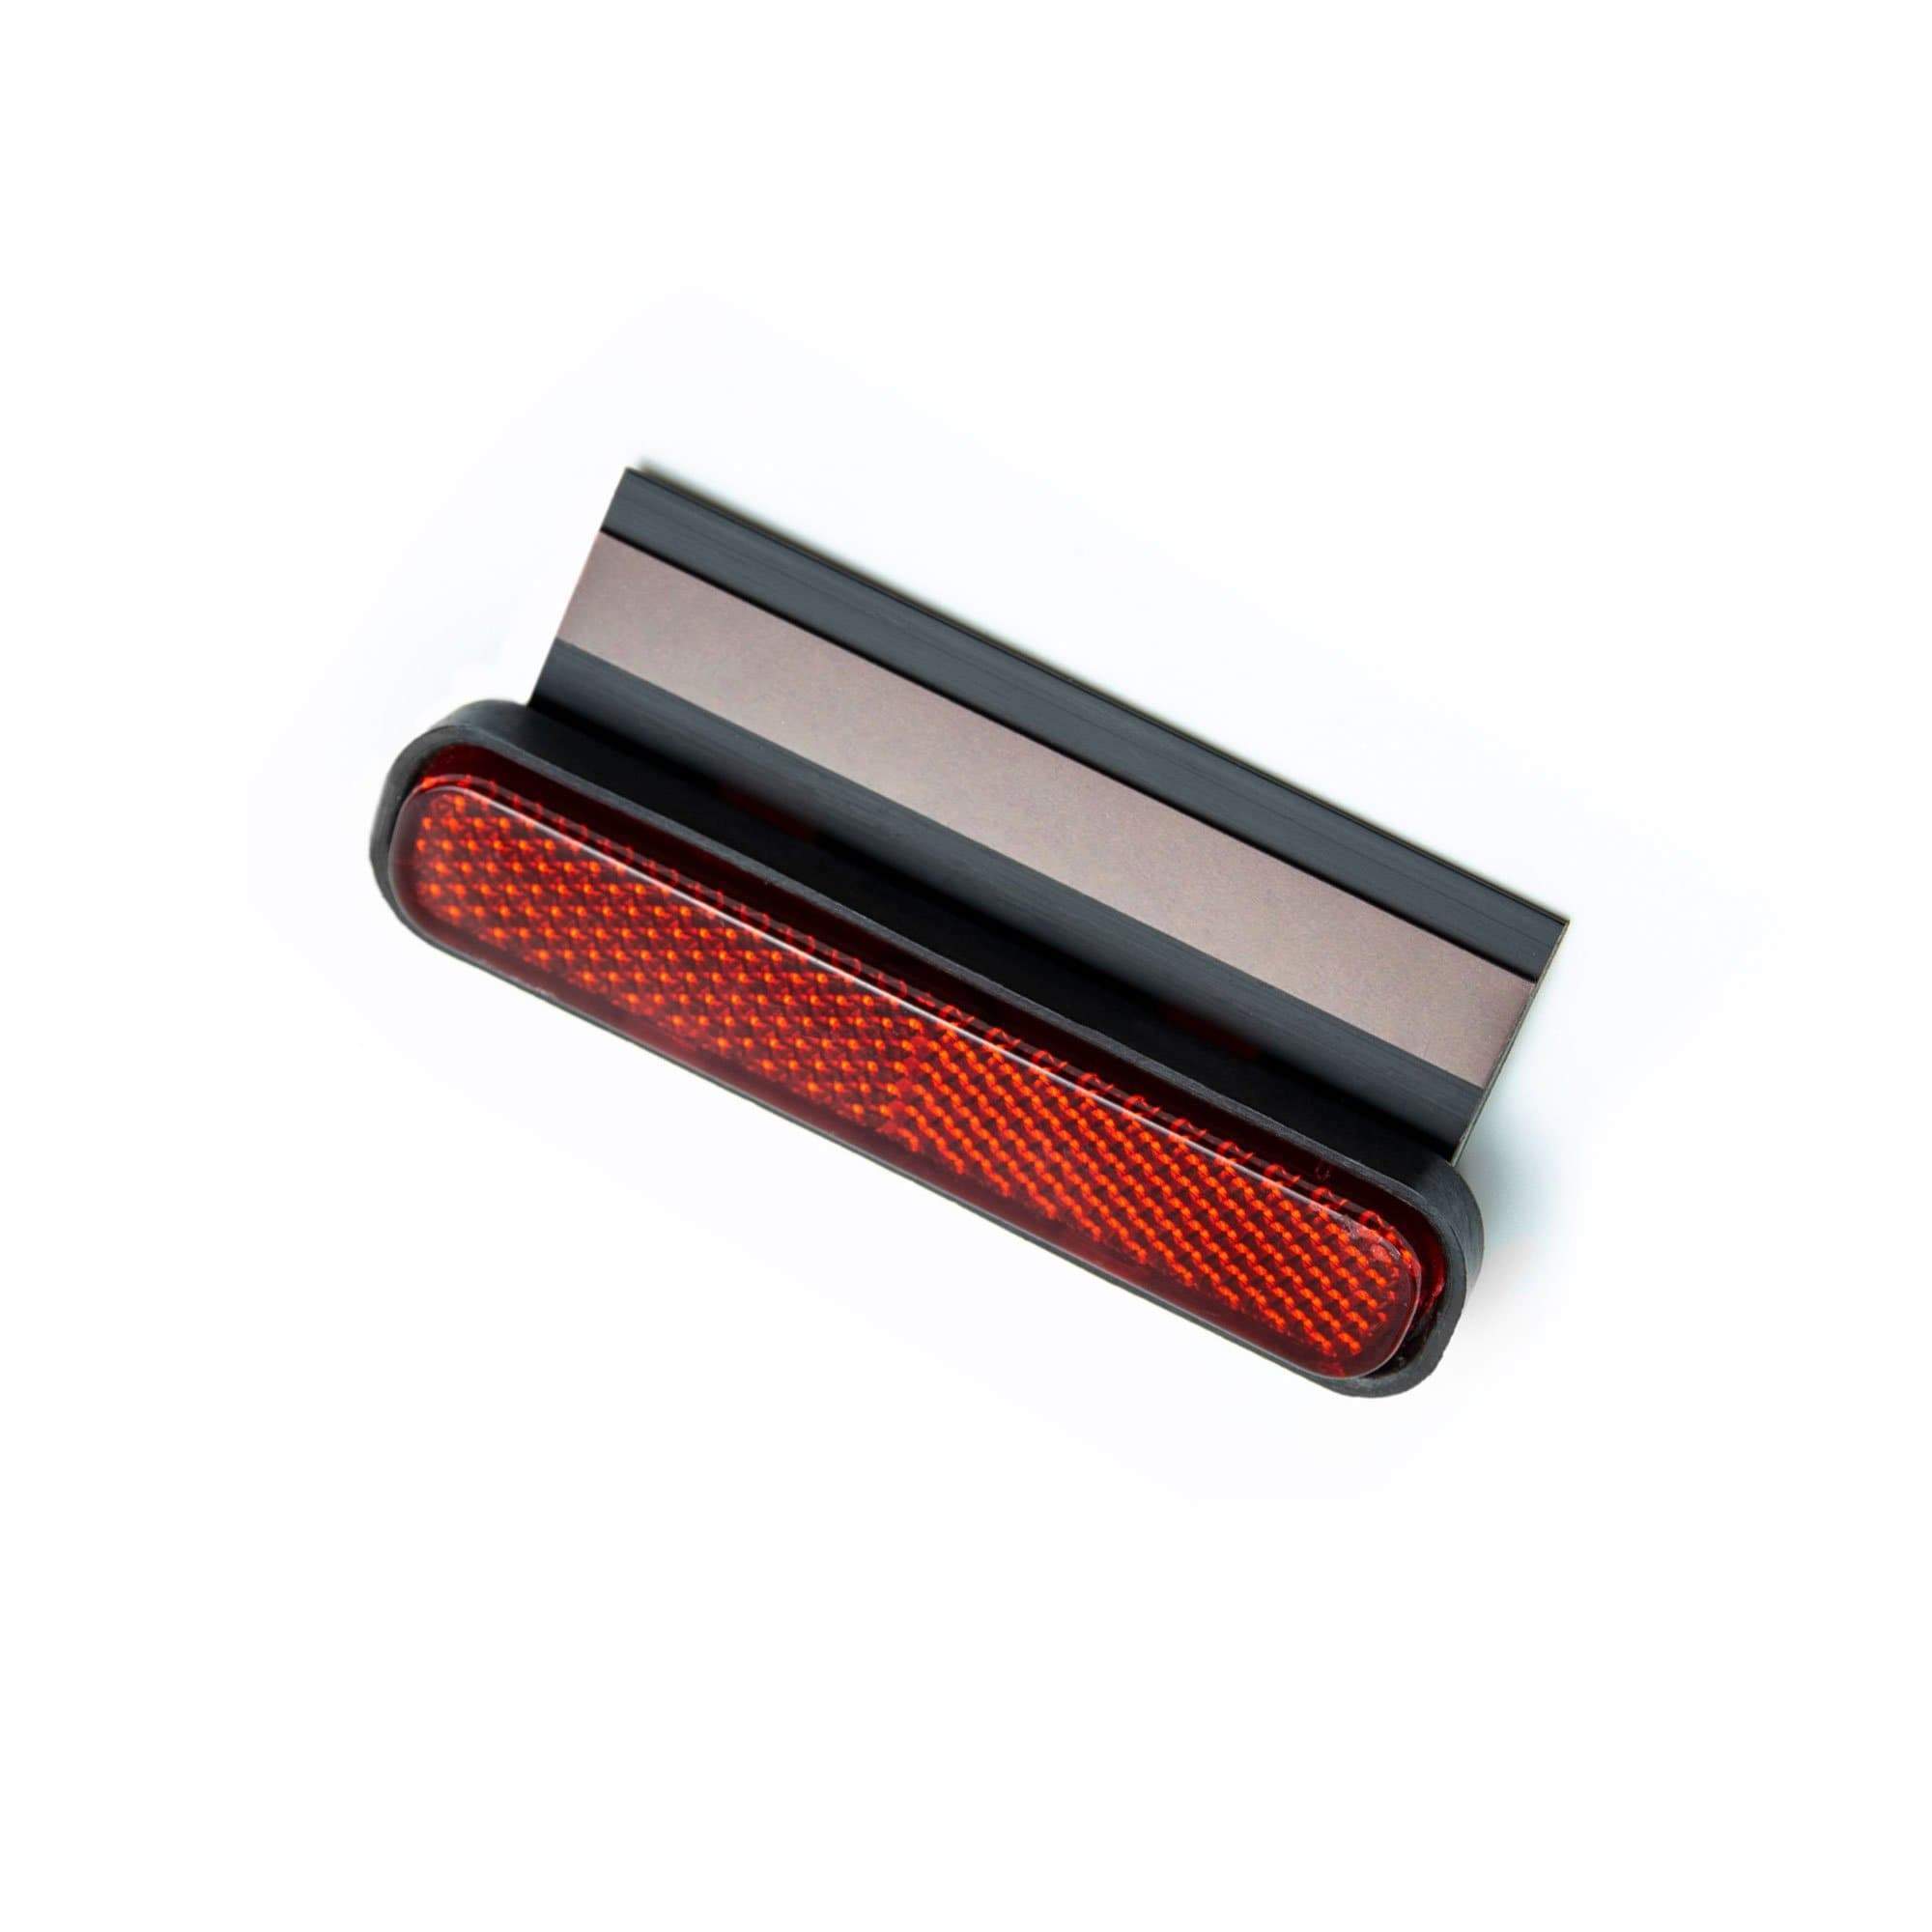
Evotech Tail Tidy vs BMW OE hanger


note the huge reflector in OE part

note the change from rectangular light to small oval led 


installation is relatively simple.
despite the instructions , you do have to cut the wires to the rear number plate lamp

i chose to use hot gun soldering mini connectors (not supplied) , then black heat shrink supplied in kit) over the top for an OE look job.

at this point I also chose to move to a 7x5 number plate from the original UK MOT legal one which is 9x7 and has BS number and postcode.

its also up to you whether you want to fit a reflector or not.
some might argue running a non legal uk plate then why bother.
you could use a small round button reflector and fit to corner of number plate.

I wanted to fit a reflector , but needed to be much smaller than the one supplied in the evotech kit.

I used 


https://pyramid-plastics.co.uk/products/universal-number-plate-reflector

which is much smaller, neater and in keeping with the smaller plate, and means you dont drill.

(i bought 2 , one for my new plate and one for the original full size plate)

Come MOT time , I can then just undo 2 number plate screws and make the bike pass an MOT.


BEFORE and AFTER


heres a comparison of UK motorcycle plates of different sizes

the general format for a recent plate would be

AA11
 AAA

(letter box fully horizontal all text in one line is possible but no longer road legal and pretty obvious at that)

as below you can see

  • fully UK legal 9x7 plate including postcode / BS number with small reflector
  • 7x5 (that i ended up fitting) with small reflector 
  • 8x6 which is somewhere inbetween


Monday, 10 January 2022

install ctek mx 5.0 battery charger cable plug to 2017 Gen2 BMW S1000R

 I already own the CTEK MX5 charger to look after a large static caravan battery over the winter months

Included with the charger is 2 sets of adapter cables with detachable plug.
 1x crocodile clips, and 1 x M6 eyelet

Unbeknowns to me this is a perfect fit onto the S1000r motorcycle battery.


only downside I can see is that the eyelet to plug (indeed the entire cable to the charger) has no inline fuse.


to fit
remove the seat and pillion
remove the battery terminals (1 at a time) and attach the eyelets.

I chose to route the cable up into the pillion area, so i can attach the charger easily just by using the key

under main seat with the terminals attached


charging cable attached (shows location of the plug in the pillion area


close up on the terminals


charger on and selected for 'motorcycle' and 'agm' modes


install GB racing frame sliders to 2017 Gen2 BMW S1000R


Ideally you will need

torque wrench to set the appropriate torque for the engine bolts (50Nm ?)

extended torx bits (even these ones are only just long enough to reach into the recess), i bought the ones below which seemed a reasonable kit for the money and included 2 drive size adapters as well.

https://www.toolstation.com/draper-tx-star-hexagon-and-spline-mechanics-bit-set/p66212

Contents: 10mm bit holder hexagon x 3/8" sq. drive, 10mm bit holder hexagon x 1/2" sq. drive, 7 x 30mm and 7 x 75mm Draper TX-STAR bits (T20, T25, T30, T40, T45, T50 and T55), 5 x 30mm and 5 x 75mm spline bits (5, 6, 8, 10 and 12mm), 7 x 30mm and 7 x 75mm hexagonal bits (4, 5, 6, 7, 8, 10 and 12).


GB Racing frame sliders, for my model S1000r (2018 Gen 2) there is no removal of any body panels, nor any drilling required

Not a fan of the R&G teardrop look
Evotech nice , but expensive and needs covers taken off


LHS and RHS , which refer to as if you are sitting on the bike


easy to fit, biggest issue was making sure the alloy piece slots face correctly on tightening the bolt.
to achieve this , youll need to keep the alloy piece from rotating , i used a pair of mole grips, just make sure you place something in the jaws so you dont damage the alloy inserts!

small , visually blend into the body and should help (if i drop the bike at low speed)