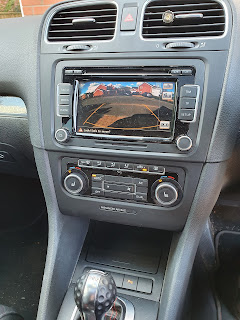
So recently I engaged Reverse on the DSG to to be presented with this
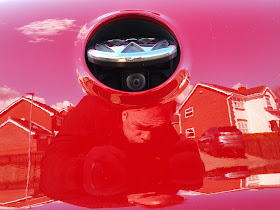
Taking to the interwebs a quick search revealed many possible causes but the most likely to be the wires to the RVC unit in the boot badge get stretched and commonly break.
My car is 2012 so 9 years old and nearly 50k miles
So i used this guide to help remove the rear hatch cover
of which you need to remove 4 screws , 3 visible and 1 thats in that upper left square hole.
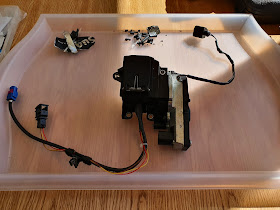
This allows you to remove the entire boot release motor and camera unit as one so you can work on it on the bench.
You need to unclip the motor , and 2 sets of camera wires (top rhs of the photo)
WARNING : At this point if you shut the boot , you can only open it from inside via the back seats through them pushed forward.
Just slide the white clip you can see on the boot latch to the left and the boot releases..
out of the car its clear to see the issue, 2 wires have snapped clean where the waterproof connector ends.
This is apparently very common
At this point you are either going to
- attempt a DIY fix of the cable
- buy a new camera unit complete
Looking at Option 2 first, its price prohibitive to just order a new camera
My part number was 5K0 980 551
To order new genuine looked like around £250 minimum and im not convinced of stock levels, not sure how much a genuine from VW actually is.
You can get what seems a reasonable part from AliExpress. (around £50 to 70 The caution here is how long it will take to arrive and you must check the type of camera and connector you have , the listings are very confusing)
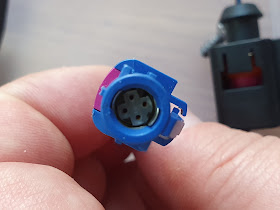
Of the 8 wires
- 5 are for the camera cable (4 pins + outer)
- 3 are seperate
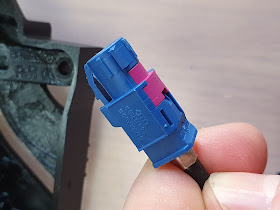
for reference the connector I have was this
Given the challenge of getting a replacement camera , and having a look at the existing guides online, I thought there was nothing to loose by attempting a repair.
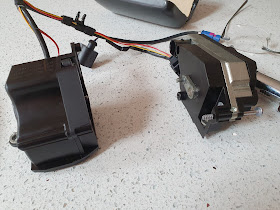
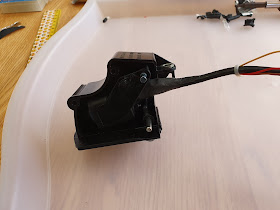
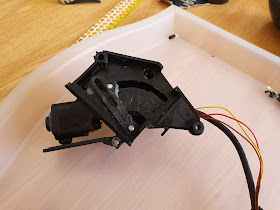
So lets take the motor apart from the mechanism/camera. Its only two torx screws
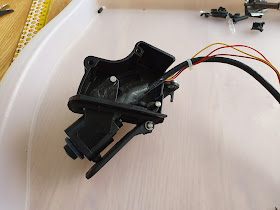
then we can split the mechanism from the camera. Single internal screw, this allows you to seperate the two halves of the mechanism.
Note : there are 2 plastic end washers (white in colour) dont loose them.
Having split the mechanism, you now want to wiggle out the internal 'flap' that contains the camera.
One of the pins slots out to help.
Once slotted out , you can remove the final 2 small screws holding the camera to the internal flap, and feed the cables through it.
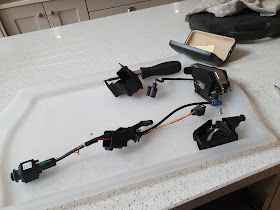
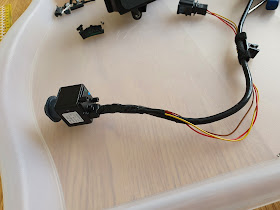
Laid out it now looks like this...
Now you have just the camera to work on, much easier.
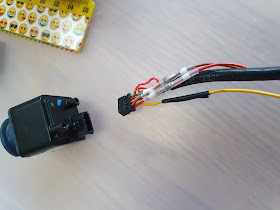
It looks as if the cables are directly sealed to the camera body, but thats an illusion. If you carefully cut (i used snipe nosed cutters) away the inch long rubber seal , it eventually comes away to reveal all the wires and a plug.
You can then look to splice your connections back together in whatever way you see fit.
As you can see above I chose to buy the items below as I didnt have either prior to this repair
- heatgun £30
- solder fixings (as you can see in the pic above) £14 (although you only need the smallest white ones)
At this point because you have available connections at either end I tested continuity using a multimeter, this allows you to prove that your connection repairs have been successfull.
Hold one end onto the exposed side of the cable block, then one end onto the plug that joins to the car.
Its also worth doing to prove no other wires have been damaged or broken but arent visible.
Once all checked I also went another step to prove it works in the car.
Go back to the car, open the boot (which at this point you now need to do from the back seats (as you unplugged the hatch release during disassembly)
Just plug the 2 camera connector back in and hook it over something
AND CLOSE THE BOOT (IF YOU DONT HAVE THE BOOT CLOSED THE HEAD UNIT SHOWS A BLUE SCREEN AND APPEARS BROKEN WHEN ITS NOT)
turn on the ignition and select R , at this point if youve fixed the wires you should now have a camera image.
Having proved its successful you can now unplug it again and start the sealing and re-assembly.
i wrapped the wires with some black insulation tape.
I have also loosened the wires in the central 'bracket' to give the camera end more flex
then attempted to mimic the orginal covering using Sugru £6 , its a moldable semi flexible plastic.
I took 1 piece and moulded it round the cable as per original , using a wet finger to get a smooth effect.
Then I started to immediately re-assemble the flap (2 screws)
then assemble flap back into the mechanism
then attach mechanism back to motor, to give you an assembly that can go back in the car now ...
place it back in the car AND RETEST IT AGAIN
now you can put the boot back panel on , i sprayed GT85 lubricant on the metal clips to aid refitting.
be patient and take your time, it does go back I promise.
Grab a cup of tea/coffee/rum and celebrate a job well done.
Not sure how long it will last but even if it all goes wrong you still have Option 2 to buy from China.
guides that helped me
https://uk-mkivs.net/topic/649304-golf-mk6-reversing-camera-repair-and-fix/




No comments:
Post a Comment